Daily Tracking

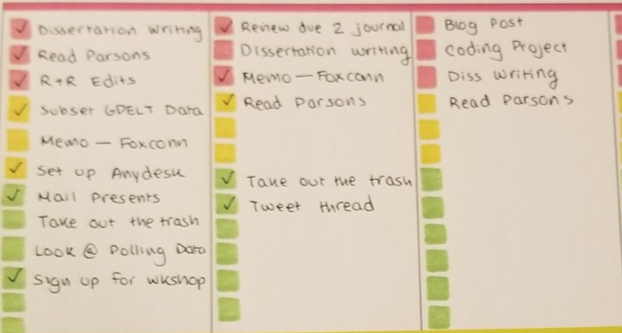
Habit Tracking. It’s a really popular trend in bullet journaling, despite not being part of the original rapid logging system. And it’s that way for a reason: people like to see the progress they’ve made, or habits they’ve kept up with. Sometimes they’re functional or necessary, like taking medication or tracking the number of hours you sleep. Sometimes, they’re aspirational, like workout trackers or recording the number of pages you write every day. There are tons of activities you can track and many ways to track them, both physical and digital.

I use a few trackers to look at what I do every day. One of my favorite things to do is look at past habit tracker pages to see what I was doing at any given week (and with a discbound planner system, I can actually pull all the habit tracker pages out and look at them together)!

In the beginning of 2019, I tried maintaining monthly and weekly trackers. By March, however, I had completely switched over to weekly trackers—I just don’t have the patience to keep flipping back to update a monthly tracker!

Here’s a template of the weekly tracker page I use now. On the top of the sheet is my time log, on the bottom is a group of other trackers. (Disclaimer: this picture, and all the pictures in this blog post, are not real. While I do use this habit tracking template, I am not using real information to fill out the time log or habit trackers below).

 
An example of a weekly habit tracker page.

An example of a weekly habit tracker page.


The Time Log

On the top half are time trackers (sometimes known as a time log, since 1 page has 7 time trackers). Each row has 24 boxes: one for each hour of the day. My days begin at 6 a.m. and end at 5:59 a.m. the next day, so the first box of the day is 6 a.m. to 7 a.m.

 
An example time log. In this example, I am midway through my Tuesday.

An example time log. In this example, I am midway through my Tuesday.


I use a combination of seven or eight colors to identify out what I’m doing at any given point. Sleeping (which is grey), “down time” (orange), and meetings (purple) are common things to track. I also track reading (pink), writing (red), programming (blue), hand coding (light blue), and “misc work” (green). These more detailed codes allow me to really see where my work time is spent on any given day.

Writing, in particular, involves a lot of different tasks. The three that are the most common for me are: outlining, new writing, and proofing. If I want to provide more detail about what I’m doing when I’m “writing”, I’ll mark a box with “O” for outline, “W” for new writing, and “P” for proofing.

Underneath each time tracker, I will write notes and details about that day, things that add context to the day’s data. This includes (but is not limited to): social functions I attend, exam days, major grading days, conference deadlines, travel days, and sick days.

Other Trackers

Below my time log are templates of a few other trackers. I don’t actually use all of these; I just wanted to present different ideas of trackers you may be interested in.

Some example trackers. In my day-to-day, I do use the work tracker and the skincare tracker.

Some example trackers. In my day-to-day, I do use the work tracker and the skincare tracker.

Work Tracker

I do use a work tracker: it’s a 7x3 matrix, with each row representing a day, and each column representing a task (c = coding, r = reading, w = writing). While I already track these tasks in my time log, they’re important enough that I also want to record when I do all three daily; I like day when I code a little, read a little, and write a little.

tracker_3.png

To the right of this 7x3 matrix is a set of purple bars. Those are the number of pages I hope to write daily (my estimate). I draw a rectangle to represent the number of pages I write in a given writing session (my observed)—1 box for 1 page, 3 boxes for 3 pages. This allows me to see the days I’ve hit my writing goals… and the days I haven’t.

The combination of my time log and my writing page tracker allows me to see how much I’ve written per hour. Sometimes, the words flow out easily and I can write 1 or 2 pages in an hour. Sometimes, it’s really hard to produce good writing.

Other Trackers

I do track a variety of other, non-work tasks. These range from the mundane habits, like brushing my teeth or showering, to hobbies, like baking and doing calligraphy.

For most of these tasks, each box represents one task per day (similar to my work tracker, the columns are the tasks and the rows are the days). It’s easy to vary up these tasks based on my needs that week, or things that I want to improve on. For that reason, the list of habits that I track change week-by-week.

Sometimes, I want to keep track of a more complex habit (e.g., taking multiple types of medication or my skincare routine). For this, I’ll often use a frankenlog system.

The Frankenlog

The goal of the frankenlog system frankenlog system, generally, is to jam as much information into a single page of your bullet journal. This is a great, minimalist strategy that gives you a “bird’s eye view” without sacrificing the detail.

One of the awesome features of the frankenlog is the “four mark” daily habit box. Each habit is tracked with a single pen stroke, allowing for four habits to be tracked with one box.

I use this system to track my skincare routine. In the morning, I have four tasks: face washing, toner, vitamin c extract,  and sunblock. In the evening, I have seven or eight tasks: face washing, micellar water, toner, face mask (sometimes), eye cream, hyaluronic acid serum, retinol, and night cream.

 
An example of a frankenlog habit tracker. Each “box” can track up to four different tasks or habits. In this skincare example, I have 4 morning steps and 8 nighttime steps.

An example of a frankenlog habit tracker. Each “box” can track up to four different tasks or habits. In this skincare example, I have 4 morning steps and 8 nighttime steps.


Weekly trackers give me a good sense of what I’ve been doing that week. This helps me make sure I’m living a (relatively) balanced life—time for work, for friends, and for myself. Plus, I love to see the bars fill up over the course of the week.

Example time lapse of a week’s worth of habit tracking information.

Example time lapse of a week’s worth of habit tracking information.

Daily Scheduling

If my weekly (master) to-do list is looking at the forest, my daily to-do and schedule are the individual trees.

My Daily To-Do List

My daily to-do list is a selection of tasks from my weekly to-do and minor to-do’s that come up over the course of the day (things like taking out the garbage or responding to that email… or posting on Twitter). This step is not super necessary, but it is the middleman between my weekly to-do list and my scheduler.

Here are 3 days of to-do lists.

Here are 3 days of to-do lists.

Sometime in the summer of 2019, I started color-coding my tasks by priority. I have three red boxes for “high priority” tasks, three or four yellow boxes for “middle priority tasks” and about six or seven boxes for “low priority tasks.”

I often repeat long tasks that take me several days. I check off a task when I’ve worked on it that day (not necessarily when I complete it—that’s what my master to-do list is for). In the above example, I just wrote “Dissertation writing” or “diss writing”, but I tend to be more specific (e.g., what chapter of my dissertation am I working on?)

My Schedule

Once I’ve written my to-do list, it’s time to work on my schedule for that day. Right now, I’m using my Happy Planner to schedule my days. I really like writing out what I’m going to do the next day. I know many people prefer to be high-tech, though (most people have an iCal, gCal, planner, scheduler, or something digital). I’ve had both a Google calendar and a planner for the majority of my time in higher education (there were one or two years where I gave up on the physical scheduler).

For a while, my primary schedule was digital (Google Calendar). This was great when I took classes or was a Teaching Assistant because I had to work around major blocks of time (i.e., classes). But since I’ve started dissertating, I’ve switched almost completely over to my planner. I like being able to see my to-do list and my schedule side by side, and I couldn’t really replicate that effect with Any.do + gcal.

Though I may go back to a hybrid system in the future (where I maintain both a planner and an online calendar), it’s unlikely that I will ever go “full digital” again. There are just too many benefits to maintaining a physical planner. You don’t have to worry about having an internet connection, for one. I find that I remember my schedule better when I write it down, as well. There has been a resurgence of planning on paper in the past few years (see all the news articles discussing this in WSJ, NYT, Vox, and CNBC)!

Planners also don’t have to be too expensive. Sure, some people dish out upwards of $60.00 for their planner. But you can easily maintain a physical planner with a one-dollar notebook and a pen using the bullet journal strategy.

To make my schedule, I use a strategy called time blocking.

Time Blocking

Time blocking refers to planning out “blocks” of time to do various things. Time blocking is a great strategy for young academics because it (theoretically) forces you to devote long periods of time to a task, whether it is reading, writing, programming, analyzing, or something else.

You can time-block regardless of whether you use a digital or analog system. Below is an example of a digital time blocked schedule in April 2017 (When I was a teaching assistant and taking classes). I’ve color-coded many of my tasks: light green is for my own classes, dark green is for my research groups, blue is for the class I was a teaching assistant, light red for reading, dark red for writing, purple for programming, and seafoam green (“peacock”) for hand coding (for a traditional content analysis). Color coding online (or offline) can be really useful—it’s a way to quickly see what you need to do.

My time blocked schedule from a week in April 2017 (when I was still working as a teaching assistant and taking classes). I do have some gaps in time, so not all of my time is completely organized. But it does what I need it to do, and that’s the most important part!

In my physical planner now, I block time by assessing what I need to do for that day, estimating how long it takes to do that task, and trying to find a block of time to fit into my schedule. For example, if I know I want to dedicate 3-4 hours to working on a paper, I’ll look for a time in my schedule to fit that in.

Here’s what my planner looks like now. Happy Planners with a vertical layout (like mine is) are blocked into thirds. I used the first box to write my to-do list and a second box to write my time blocked schedule. My third box is a wild card: I’ll put quotes in it, grocery lists, or agendas for meetings.
Vertical planning layouts mean that you plan vertically (in columns). Each day is a column. Some vertical planners are already time-stamped. Horizontal planning layouts, on the other hand, have wider and shorter spaces for their days. Days are stacked on top of each other.

Time blocking may seem overboard (“you mean I have to schedule all my time?”*) but there is a big payoff: I get more work done and have dedicated time to major projects, and I force myself to have breaks by blocking them in. This is very important: taking time off is important, and scheduling in a break is better than not taking a break at all.

My time blocked schedule is also an estimation—the only person forcing you to your time blocked schedule is yourself. It is rare that my time blocked schedule aligns perfectly with reality. Like most people, I tend to overestimate what I can do (we all do; it’s called planning fallacy). Or, there are days where I just crash. When this happens, it’s important to not be hard on yourself. A time blocked schedule is supposed to help you, not make you feel like shit.

Sometimes, advocates of time blocking say that it prioritizes your work. This is true to some extent—but it’s not the point of time blocking; at least, it’s not to me. Time blocking prioritizes your time: you only have so many hours in the day to live (to work, to relax, to create, to think, to thrive, to cry, to eat, to poop, to sleep). Time blocking, at least the way that I use it, helps me maintain a balance between work and life. I put in break times because I know I can’t work 24/7 (or at least, I know I shouldn’t or I will burn out). Time blocking allows you to prioritize what is important. That might be work, or that might be your creative endeavors after work, or time for you to hang out with friends.

* Obviously, you don’t have to schedule all your time away. In my digital calendar from 2017, I obviously had gaps of time.

When do I do all of this?

At the end of the day, I write my to-do list and my schedule for the next day. It’s usually one of the last things I do. I’ve tried to write my schedule on the morning of that day, but I’ve had less success with that (some people do prefer to plan in the morning, though). Here are my steps:

  1. Review my Master to-do list. Is there anything urgent I need to consider or include?

  2. Write my Daily to-do list. I rarely fill out all the boxes at this point (if there are 10 boxes total, I usually fill about 5 or 6).

  3. Write my schedule by the hour (or half-hour). The first thing I think about is when I need to wake up for that day.

  4. I then fill it in with meetings and major deadlines.

  5. I finally time-block my remaining time. Conventional wisdom suggests that the first few hours of your day are your most productive. I like to get a lot of writing or coding out of the way in the morning. I always make time for breaks.

Writing and Maintaining a Weekly To-Do

The core of my scheduling system is my weekly to-do list. When I have new tasks or things to do, this is where I write them down. I keep one to-do list a week; it is my master to-do list. During an academic week, my to-do list can range from anywhere between 20 and 45 items. My to-do lists are cumulative: that means I include work tasks (e.g., course assignments, reviewing papers, and writing) and personal tasks (e.g., baking, cleaning the fridge, and taking out the garbage).

Where do I write them?

When I first started writing weekly to-do lists, I used to write them on index cards, loose white paper, or college-ruled three-ringed binder paper. Now, I use dotted paper in my Happy Planner. 

What do they look like?

A mock to-do list. Notice that I have included work things (e.g., analyses for projects) and personal things (“Dye Hair”).

My to-do list is a pretty simple numbered list. Though I’ve used the same general system since high school, I’ve made two major edits that have really helped me out.

  1. I vary the length of my “check box” to indicate the length of time it takes to complete that to-do task. This is where dotted paper comes in handy because I can draw these boxes easily. I’ll also only draw boxes when I’ve started working on a task (that way, I’ll be able to see which tasks I didn’t work on that week).
    Most of my tasks have one to three boxes. One box is a relatively short task (e.g., writing a rec letter, sending an email). Two boxes indicate that the task is longer (e.g., writing a blog post, reading articles). Three boxes are for the longest tasks (e.g., writing part of a paper, grading, finishing coding tasks). Sometimes, especially when I’m collecting data, I’ll have longer boxes (e.g., if I’m collecting news articles for a constructed week, I’ll draw seven boxes).
    When I finish a task, I “x” out the number and color in the checkbox (like Task 5)

  2. Many of the things I do require multiple steps. I’ll “thread” related action steps by writing the second task next to the first task’s check box. This is especially useful for data analyses. For example, if I need to: collect tweets, analyze them, create a graph, and then write a blog post, I’ll write this as multiple steps on one row.
    We can see this in the example to-do list. Task 8 requires me to grade first, and then put the grades in the gradebook. In this example, I’ve finished grading, but I haven’t put them in the gradebook. Task 10 requires me to collect data first before using the data in a lesson plan. I’ve planned to do this task, but I haven’t started on it yet.

  3. For tasks that are urgent or must be done by a certain date, I indicate that task with a star and/or I write the due date of that task to the far right. To do this, I use an erasable red Frixion pen (I like being able to erase the stars). Honestly, I don’t think how you indicate it matters (you could highlight your task, or use a permanent pen, or something else), but you need a way to signal to your brain that this task has a looming deadline.
    In this example, Task 7 (read book chapter 1 & 2)is important. Task 8 and 10 are due Friday. It may not be urgent on Monday, but I would likely put stars next to these tasks by Wednesday.

    When I am done with a task with a star, I erase the star on that task and cross the task out as I normally would.

Notice that Task 6 (7-day data collection) has 7 boxes. Task 8 (grading) is a lengthy task (once I grade something, I have to also record it in my gradebook, which is a fairly quick process), Task 7 (read book chapter 1 & 2) is a medium-length t…

Notice that Task 6 (7-day data collection) has 7 boxes. Task 8 (grading) is a lengthy task (once I grade something, I have to also record it in my gradebook, which is a fairly quick process), Task 7 (read book chapter 1 & 2) is a medium-length task, and task 9 (scheduling a meeting for a project) is a short task. I have completed Task 5 (Zettelkasten Update). I’ve started on Task 3 (blog post) and Task 7, both of which are “urgent” (marked with a red star), but I' haven’t completed them.

Why use to-do lists?

This to-do list is very important to me because it is my “task dump”: it is a centralized location for me to check. When I look at my to-do list, I get a sense of what I need to accomplish. I can also tell when I’m taking on too much (e.g., when I have 40+ tasks). 

I haven’t fully completed a weekly to-do list since my last year in high school (I distinctly remember exclaiming my excitement during an AP Java class), and I write the to-do list knowing I will have to transfer several tasks to the next week (especially if I write them down on Friday, which is when I write a lot of my tasks).

When I took classes, I would try to put down my upcoming assignments at least two weeks in advance. For courses with term papers, I will break down the paper’s task into smaller increments (read articles, collect data, analyze data, write parts of the paper). I’ll then turn these smaller pieces into various action steps that I thread together (e.g., read these articles, and then write a short memo about them; grade these assignments and then post them on Canvas).

How can I do this digitally?

I’d be remised if I didn’t extoll the virtues of writing by hand, if possible. There are a lot of benefits to writing your to-do list by hand, including increased retention, the ability to practice your handwriting, and time to reflect on your tasks.

However, I understand that it might not be possible for all people. The key to maintaining a weekly to-do list is to have one centrally located place for it, regardless of where it is. You can’t maintain a different to-do list on your phone, your computer, and on different post-it notes and hope to have a handle on everything you have to do.

On your computer, you can use a sticky note application (Sticky Notes/Stickies/Xpad) to maintain a running list. If you have multiple sticky notes, you want to make sure your “Master To-Do List” is always noticeable, and probably a different color from the others. Though you won’t need to migrate tasks week by week, you should take an hour a week to assess your tasks, determine how much progress you’ve made on important ones, and remove tasks that are no longer necessary.

Want an app for that? There are also many to-do list/task manager phone apps. When I maintained a digital-dominant scheduling system (about 2 years ago), I had a digital to-do list that I would replicate in writing. During this time, I really enjoyed using Any.do because of its simplicity, but there are many other apps you can use.

What about color-coding tasks?

I’ve often tried to color-code my tasks (e.g., write all my coding tasks in green, and all my reading tasks in red, and all my grading tasks in purple), but I’ve found that what I gain from that information isn’t worth the time it takes to switch between colored pens. I also don’t carry around my colored pens everywhere.

On occasion, I do decorate my task list with interesting quotes, stickers, creatively handwritten notes.

Decorating your to-do list is also a good way to practice your letter writing and/or calligraphy (or doodling).

Decorating your to-do list is also a good way to practice your letter writing and/or calligraphy (or doodling).

What if I want different to-do lists for different things?

Some people like keeping multiple to-do lists (for example, I have daily to-do lists that are subsets of my weekly to-do list). This is especially common when you teach: you may want to keep your work plans separate from your personal plans.

In these cases, I would still encourage maintaining one master to-do list, but I would write my teaching tasks as generically as possible (“write lesson plan for X”) or my master to-do list would refer to my teaching to-do list (“complete tasks 1-3 in my teaching to-do list”).

You can absolutely have multiple planners/journals (one for personal, one for research, one for teaching/lesson plans) but still maintain one to-do list.

Preparing for 2020!

It’s December, which is when we tend to think about what we’ve done this year and what we hope to do for next year. For me, that reflection includes updating my personal organizing and scheduling system (e.g., planners, calendars, bullet journals, organizers).

Organizing has been essential to maintaining a consistent workflow throughout my academic career. It’s a living system—I continually revamp it to make sure I’m getting the most out of it. Right now, I’m using a “paper-dominant hybrid system”: my scheduler, to-do list, reading notes, and zettelkasten are in print, but I maintain a digital calendar, a citation system, and mind-mapper.

Organizing systems are as varied as academic scholars. This makes sense: your system should serve your needs. But regardless of whether it’s digital or physical, multi-platform or all in one place, it behooves scholars to have a system that isn’t a pile of scraps or things you write on your hand. Trust me when I say: there is too much to remember in grad school for you to “have it all in your head.” If you don’t write things down or record it, things will inevitably slip from your mind.

For that reason, I'm hoping to spend my next few blog posts talking about how I organize my academic life (from day-to-day scheduling to keeping notes that will last a decade). I’ll also talk about how I’m updating my 2019 system for the new year.

But before I proceed, here are a couple of disclaimers/considerations:

  1. No organization system is perfect forever. In the planner community, the term “planner peace” refers to having a system you are completely satisfied with. While this sounds awesome, realistically, you won’t find a system that completely fits you for your whole life. Your planner system will change as you and your career changes—but this is how it should be, because what you need from your organizing system will change.

  2. Maintenance is key. A good organizing system relies on regular maintenance. That might involve setting aside time weekly to update your citations, review your planner/calendar, or to clean your to-do list. As diverse as organization systems are, they all still require maintenance.

  3. The best-laid plans of mice and men often go awry. Few of the days I schedule and organize go exactly as I anticipated. Even if I write a daily to-do list, I rarely complete it. Don’t be hard on yourself when your plans go out the window for a day (or longer). Don’t feel bad if you have to forgo your organizing system for a bit when things get hectic.

  4. Don’t mistake planning for doing. Planning out your day is not the same as actually doing what you planned. Don’t make planning busy-work to avoid the real work you have to do.