
My zettelkasten is the heart of my long-term notes. The German word “zettelkasten” literally translates into “slip box” (as in slips of paper). Built properly, it acts as a system of notes that you communicate with and, over time, learn from.
The premise is relatively simple: a zettelkasten is a collection of notes (think flash cards, but for comprehension and not rote memorization). Each note (or “zettel”) is a thought, bit of information, or concept. My zettels typically contain a keyword or phrase, some definition(s), relevant authors, and possibly causes/effects (antecedents and consequences of the concept).
Zettelkastens can be online and offline. In fact, I first learned about the zettelkasten system from Beck Tench, who uses a Zettelkasten via Tinderbox.
My zettelkasten is physical (surprise, surprise). For some time, I used regular index cards. However, when I switched to a discbound planner system early in 2019 (see my scheduling system here), I decided to also create a discbound zettelkasten. This allowed me to flip through my zettels and take them out to organize them in interesting ways.

An prototype of my zettelkasten. I took this picture while transitioning some of my old zettels into the final discbound zettelkasten.
Each zettel is a 4x3 index card, which is the size of the micro happy planner. I punch disc holes on one of the long sides of my zettels.
I keep my zettels in loose alphabetical order, so they’re relatively easy to find. I would discourage organizing one’s zettelkasten by topic or something because it may discourage unusual and surprising combinations of concepts (this is one way your zettelkasten “talks to you”).
Zettelkasten Key
Though I don’t formally organize my zettels (aside from alphabetically), I do ID each card with a unique alphanumeric sequence. Whenever I reference the zettel, I include the ID (both online and offline). My ID is a little complicated: the date of creation, followed by a field tag, a level of analysis, and a keyword. It typically looks something like this:
20191222CT0001word
“20191222” is the date (2019-12-22). “CT” stand for the field (Communication Theory). “0001” implies an individual-level idea. Finally, “word” is the keyword.
Understanding my identification system. This is the first page of my zettelkasten. The stickers and washi tape were gifted to me by fellow grad students in my department!
Identification systems do not need to be nearly as complex as mine, but they do need to help you produce unique identifiers. When I reference Zettel A in in Zettel B, I’ll write the ID of Zettel A into Zettel B.
Writing the Zettel
In addition to an ID, my zettel also includes:
The concept, usually a phrase or word. One zettel should be one “piece” of information. I also have dated zettels to refer to historical events (like the American Revolution, WWI, and the establishment of GATT.
A brief definition or explanation of the concept. Sometimes, I’ll reference other zettels.
On the back of my zettels, I have post-its referencing the other zettels (with the concept and the ID) and the names of relevant scholars or citations of relevant articles.

Front of Zettel
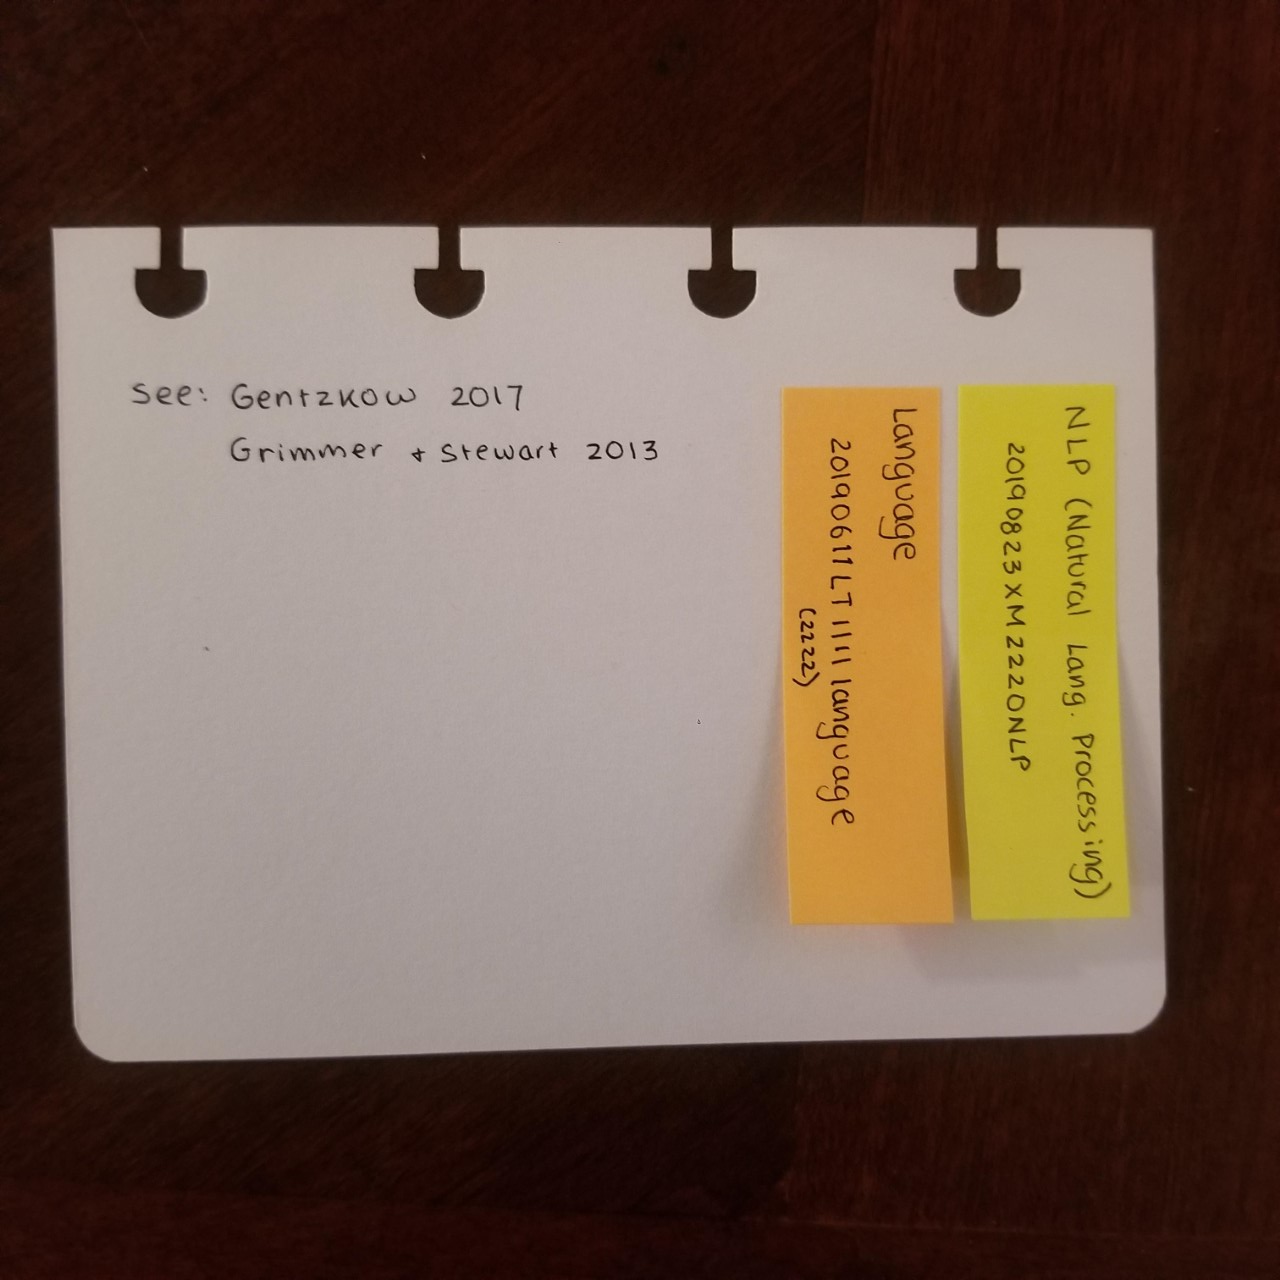
Back of Zettel
Combining Zettles
To write literature reviews, I take out my zettelkasten and combine multiple concepts in a “physical mind map” (If I like it enough, I’ll write it out as a cohesive flow chart and will digitize it).
One of the first times using my zettelkasten prototype. In the upper left corner, you can see the ways in which I combined the zettels to make a claim.
In this process, I often treat my zettels as nouns or verbs. Arrows are usually verbs or prepositions. I then use these zettels to create first drafts of my thesis statements (for short memos and articles, in particular).
Book Logging and The Zettelkasten
As I mentioned in my previous blog post, I use an open circle bullet (o) to indicate an idea I want to put into my zettelkasten. Sometimes, I want to write new zettels. Other times, I want to add to already-existing zettels. In the case of the latter, I’ll write that zettel’s ID in my notes, so my book is also “linked” to my zettelkasten.
When I add the information to my zettelkasten (either as a new zettel or when expanding on an already existing zettel), I fill in the circle. I try to scan my book log once a week to transfer concepts to my zettelkasten.
This process is great because it allows me to review my notes. When I want to add new notes, I use a different colored pen, so I know what my original comments were and what my newer comments were.

